Staring at a blank patch of dirt is the most intimidating part of gardening. You have the seeds, the enthusiasm, and the soil, but then “Analysis Paralysis” sets in. How far apart do the carrots go? If I plant tomatoes here, will they kill the lettuce? Do I really need a degree in geometry to plant a salad?
Most gardening guides fail beginners because they treat the garden as a static photograph—a snapshot of a perfect day in July. But an organic garden is a moving movie. It changes from month to month.
Stop guessing. We aren’t just giving you “ideas” or generic inspiration; we are giving you blueprints. These are “Zero-Math” layouts designed for small spaces (4×4 and 4×8 beds) that work with nature, not against it.
The Physics of Sunlight (Why Orientation Matters)
Before you drive a single stake into the ground, you must respect the physics of light.
In organic gardening, we don’t use synthetic fertilizers to force growth; we use the sun. Your goal is to maximize PAR (Photosynthetically Active Radiation).
1. The Solar Aspect
If you live in the Northern Hemisphere, your garden bed should ideally face South. This orientation captures the most sunlight hours throughout the arc of the day.
2. The “Shadow Map” Rule
The most common mistake beginners make is planting tall crops in front of short ones.
- The Rule: Tall crops (Corn, Pole Beans, Trellised Peas, Tomatoes) must always go on the North side of the bed.
- The Reason: The sun angles from the South. If tall plants are on the South side, they will cast a “shadow shadow” over your smaller plants, stunting their growth.
3. The Heat Sink Effect
If your small garden layout is near a brick wall or stone path, use it. Stone absorbs heat during the day and radiates it at night. Place your heat-loving crops (Basil, Peppers, Eggplant) closest to these thermal masses to extend your growing season.
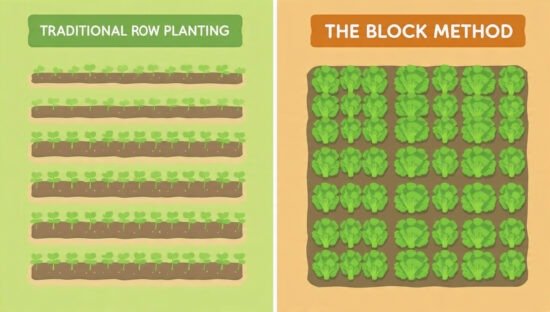
The 4-Square Method vs. Row Planting
If you see a garden layout with long, single rows of vegetables separated by walking paths, ignore it.
Why “Row Planting” is a Trap
Traditional rows were invented for tractors, not people.
- Wasted Space: You spend 50% of your garden space on paths for your feet, not food for your table.
- Soil Compaction: Walking between rows compacts the soil, killing the microbiome.
- Weed Pressure: Exposed soil between rows is a magnet for weeds.
The Organic Solution: The 4-Square (Block) Method
We recommend Bio-Intensive planting. instead of rows, we plant in blocks (grids).
- Living Mulch: By planting crops close together (so their leaves just barely touch), you create a canopy that shades the soil. This retains moisture and prevents weeds from germinating.
- The Math: You obtain roughly 4x the harvest in the same square footage compared to row planting.
3 “Zero-Math” Layout Blueprints
Stop calculating inches. Use these pre-planned setups.
Layout 1: The “Salad Bowl” (4×4 Bed)
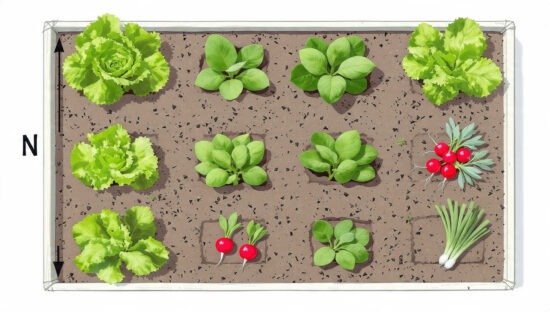
The 4×4 Salad Bowl Blueprint: This grid-based layout utilizes the “16-square method” to maximize yield. By placing fast-growing radishes alongside slow-growing spinach, you create a natural succession. Note the North-to-South orientation: keeping leaf crops in the center ensures they receive optimal “PAR” (sunlight) without being overshadowed by taller perimeter plants.
Best For: Impatient beginners who want quick wins and early harvests.
- NORTH (Back 1 Foot):
- Trellised Peas: Plant these along the back fence/trellis.
- Spacing: 1 seed every 2 inches.
- CENTER (Middle 2 Feet):
- Spinach & Arugula: These grow fast.
- Spacing: Imagine a checkerboard. Plant one seed in every black square.
- SOUTH (Front 1 Foot):
- Radishes & Carrots: These are short and won’t block the sun.
- Spacing: 16 carrots per square foot (think 4 rows of 4).
Layout 2: The “Salsa Garden” (4×8 Bed)
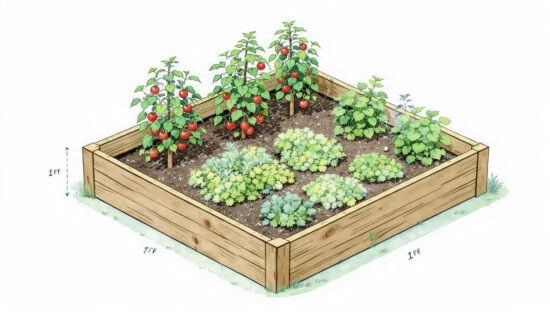
The Salsa Station Layout: A themed approach to companion planting. This isometric view shows the “Shadow Map Rule” in action: Indeterminate tomatoes are staked on the North edge, acting as a windbreak for the delicate cilantro below, while the sun-loving Jalapeño peppers occupy the high-exposure center squares for maximum heat and fruit production.
Best For: Summer cooking enthusiasts. This layout maximizes companion planting to deter pests organically.
- NORTH (Back Row):
- Tomatoes (2 Plants): Stake them heavily.
- Companion Trick: Plant Basil directly in between the two tomato plants. The basil improves the tomato flavor and confuses pests with its scent.
- CENTER (Middle Rows):
- Jalapeño or Bell Peppers (4 Plants):
- Spacing: 1 plant per square foot.
- SOUTH (Front Row/Edges):
- Cilantro & Onions: Plant these along the border. Their strong scent acts as a “nose blind” for pests looking for your tomatoes.
Layout 3: The “Root & Leaf” Combo (Vertical Focus)
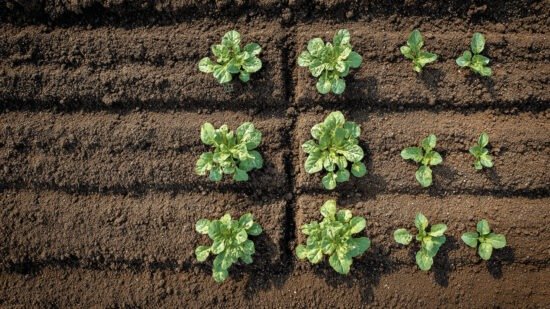
Efficiency Audit: Rows vs. Blocks. On the left, traditional row planting wastes up to 50% of your garden space on walking paths. On the right, our “Zero-Math” Block method creates a “Living Mulch.” As the plants grow, their leaves touch, shading the soil to prevent weed germination and reducing water evaporation by nearly 30%.
Best For: Tiny balconies or patios with limited square footage.
- The Vertical Element: Use a trellis or A-Frame. Plant Pole Beans or Cucumbers to climb up.
- The Understory: In the shadow cast by the beans (the shady side), plant Lettuce or Swiss Chard. These greens hate hot summer sun and will thrive in the dappled shade provided by the beans.
The “Living” Garden: A Guide to Succession Planting
Most beginners plant once in May and retire in August. But an organic garden should never have bare soil. Bare soil is dying soil. You need to treat your layout as a Timeline, not a Snapshot.
The “If/Then” Swap Chart
Use this chart to keep your small garden productive from April through October.
| Season | If You Harvest This… | …Plant This Next (Succession) | Why It Works |
| Late Spring | Spring Peas (Finished) | Bush Beans | Peas leave nitrogen in the soil; beans love nitrogen. |
| Early Summer | Radishes (Pulled) | Peppers or Eggplant | Radishes are cool-season; Peppers need the summer heat. |
| Mid-Summer | Lettuce (Bolted/Bitter) | Carrots | Carrots grow deep; the lettuce used surface nutrients. |
| Late Summer | Bush Beans (Finished) | Kale or Garlic | Kale survives frost; Garlic overwinters for next year. |
Beginner Layout Checklist
Before you plant, run your plan through this safety check to ensure success.
- [ ] The Hose Test: Can your water source actually reach the bed? (This is the #1 reason gardens fail).
- [ ] The Reach Rule: Is the bed no wider than 4 feet? You must be able to reach the center without stepping on the soil.
- [ ] The Sunlight Audit: Does the spot get 6-8 hours of direct light? (Dappled shade counts as shade, not sun).
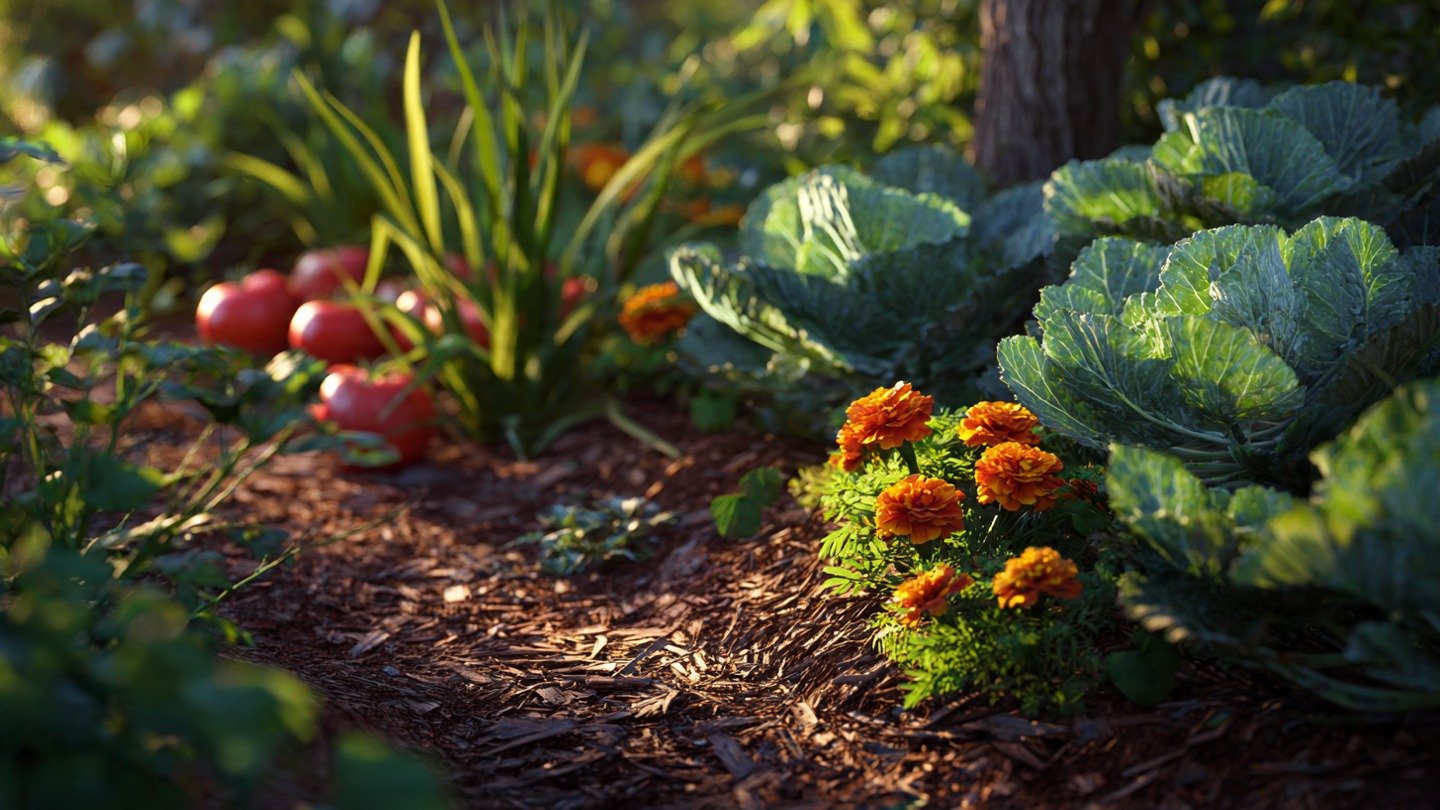
- [ ] The Diversity Check: Have you included flowers? Always add Marigolds or Nasturtiums to the corners of your layout. They attract pollinators and trap aphids.
4. The “Salsa Station” Layout
- Best for: Beginners who want a specific “end-product.”
- The Blueprint: 2 Roma Tomato plants (North side), 2 Jalapeño plants (Center), 4 Cilantro patches, and 8 Scallions (South edge).
- The Logic: All ingredients for fresh salsa in one 4×4 space.
5. The “Vertical Root-Leaf” Combo
- Best for: Ultra-small spaces (2×4 or 4×4).
- The Blueprint: A trellis on the North side for Snap Peas. Below them, 2 rows of Spinach, and a front border of 32 Carrots.
- The Logic: The peas grow UP, while the spinach and carrots grow DOWN, using 100% of the vertical and horizontal plane.
6. The “Pollinator Power” Bed
- Best for: Improving yields in the rest of your garden.
- The Blueprint: A mix of Marigolds (corners), Zinnia (center), Basil, and Parsley.
- The Logic: This layout isn’t just for food; it’s an “Insurance Policy” that brings bees to your tomatoes and peppers.
7. The “Pizza Topper” Garden
- Best for: Families and kids.
- The Blueprint: 1 Bell Pepper, 1 Cherry Tomato, Oregano, Thyme, and a patch of Arugula.
- The Logic: Highly fragrant and easy to harvest right before dinner.
Start Small, Grow Soil
The goal of your first year isn’t just to grow vegetables; it’s to learn your microclimate. Start with one of the 4×4 layouts above. If you master that, you can expand next year. In organic gardening, patience is the most important tool in the shed.
Leave a Reply